See the first issues
Now that you’ve set up the Kotzilla SDK in your app, let's validate that data collection was properly configured and explore the first issues detected by the platform.
1. Run the NowInAndroid app
- Go back to Android Studio and select Run > Run app from the menu.
- This will launch the NowInAndroid app and create a new user session. You should see the first screen of the app as shown in the example screenshot below.

- Interact with the app: scroll down to the third article in the “For You” tab and then click back and select the "Saved" tab. Click on the "Interest" tab and then click on "Accessibility".
- Stop the app run by clicking on the Stop button (red square icon) in the toolbar or go to Run > Stop 'app' to end the user session.
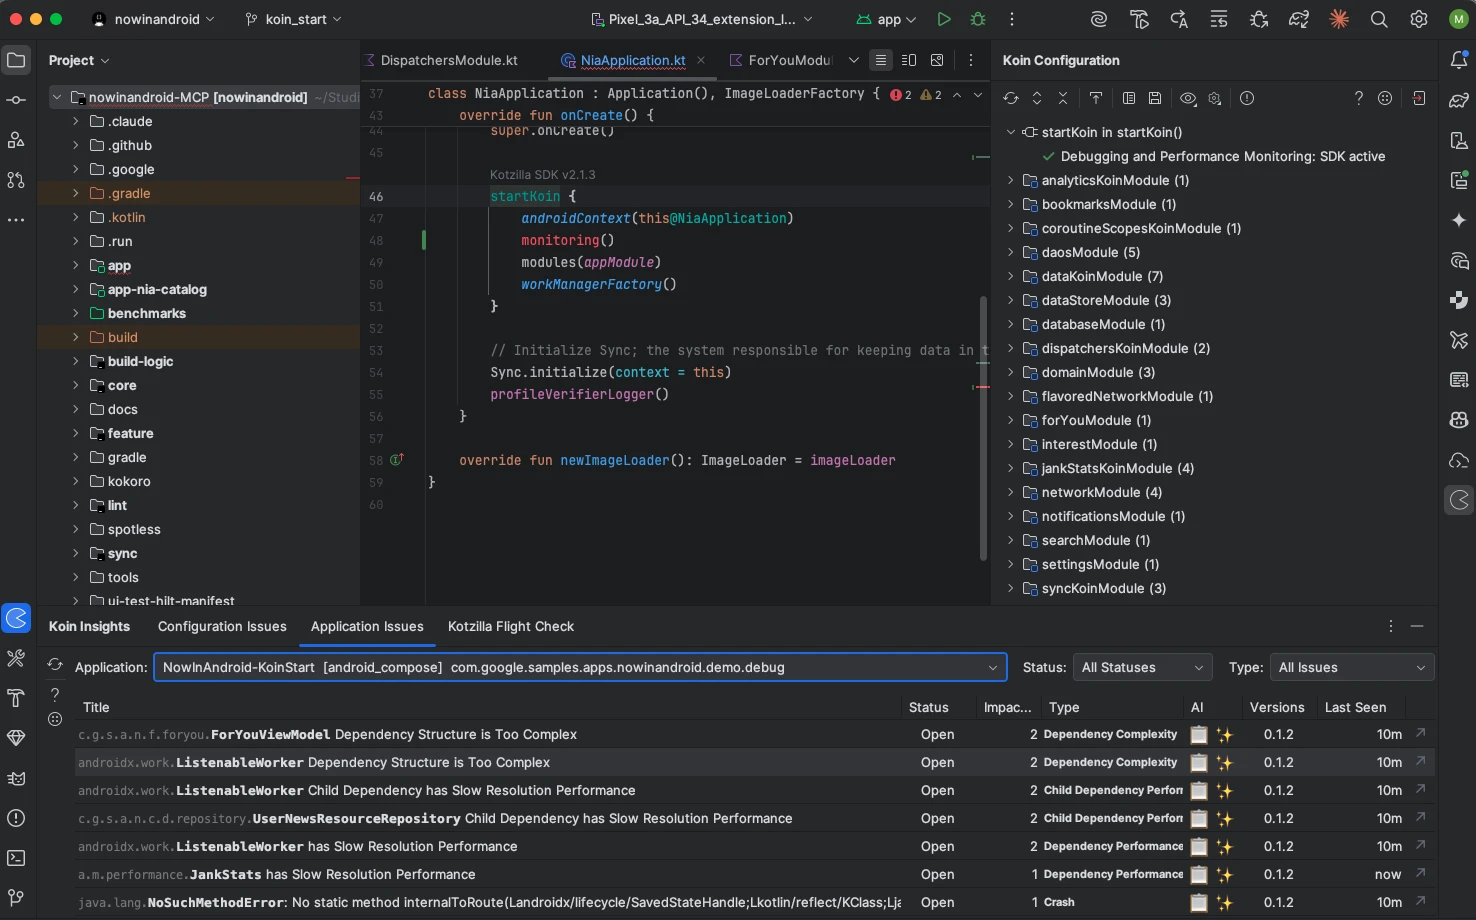
2. View issues right in your IDE
- Open the Koin Insights view in the Koin IDE Plugin.
- Navigate to the Application Issues tab.
- You should see a list of automatically detected issues for the first session of the NowInAndroid app.
3. Investigate root cause of issues
-
Single-click on any issue in Android Studio to open the impacted class directly in your IDE.
-
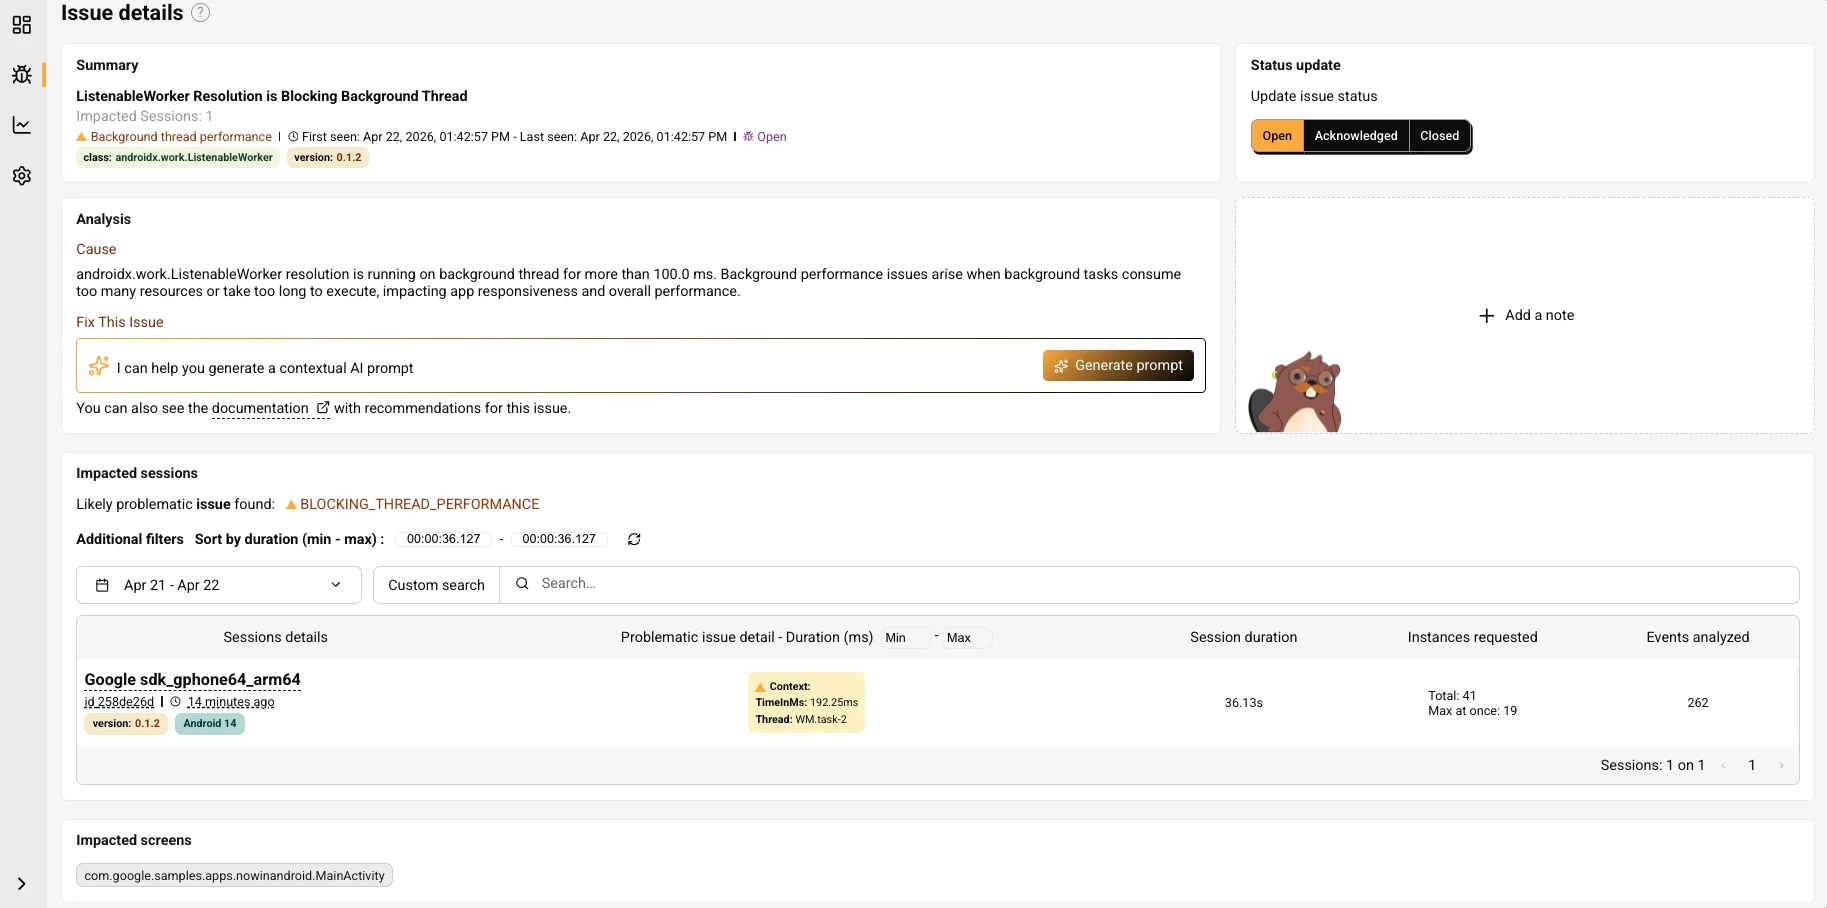
Double-click on the issue to be redirected to the Kotzilla Console, where you can see detailed information, such as:
-
The name of the component causing the issue and the reason behind it.
-
The impacted version and user sessions. In this example, there is only one version and one session since the app has been executed once.
-
Insights and recommendations on how to fix the issue, helping you resolve it efficiently.
Click on the user session impacted by this issue, and you will be redirected to the relevant event or component in the Timeline View. From there, you can expand the tree to explore related events or dependencies and continue your investigation.
If you'd like to understand the broader context around that issue, use the interactive timeline slider at the top of the view. It highlights other key user session moments, including screen transitions, crashes, and other performance issues detected. The panels below will update automatically to reflect your focus area, helping you explore surrounding activity more effectively.
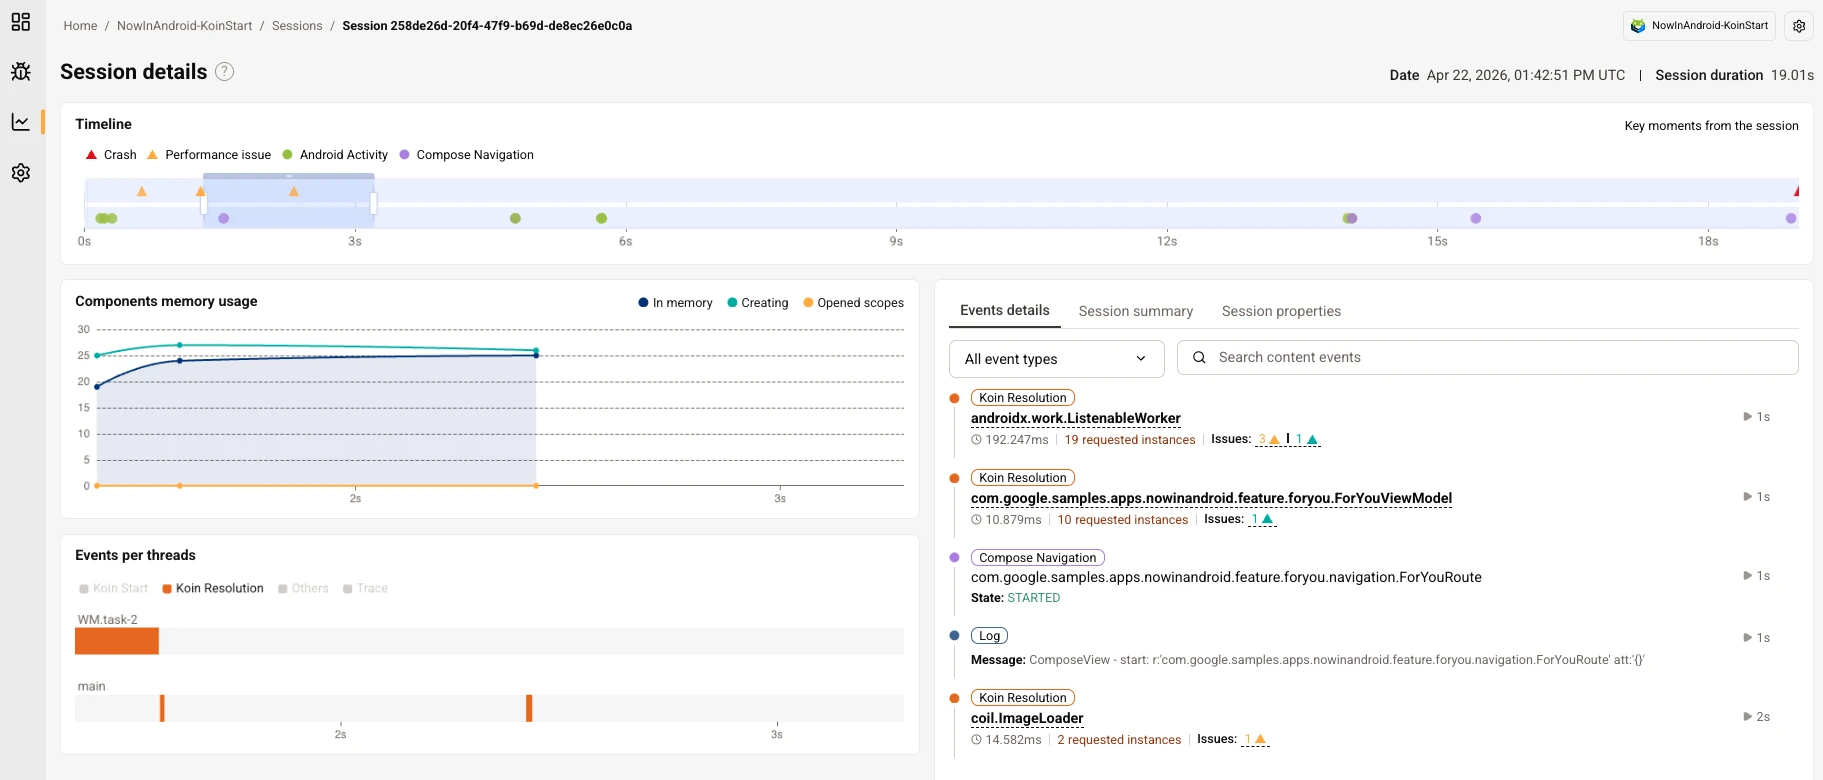
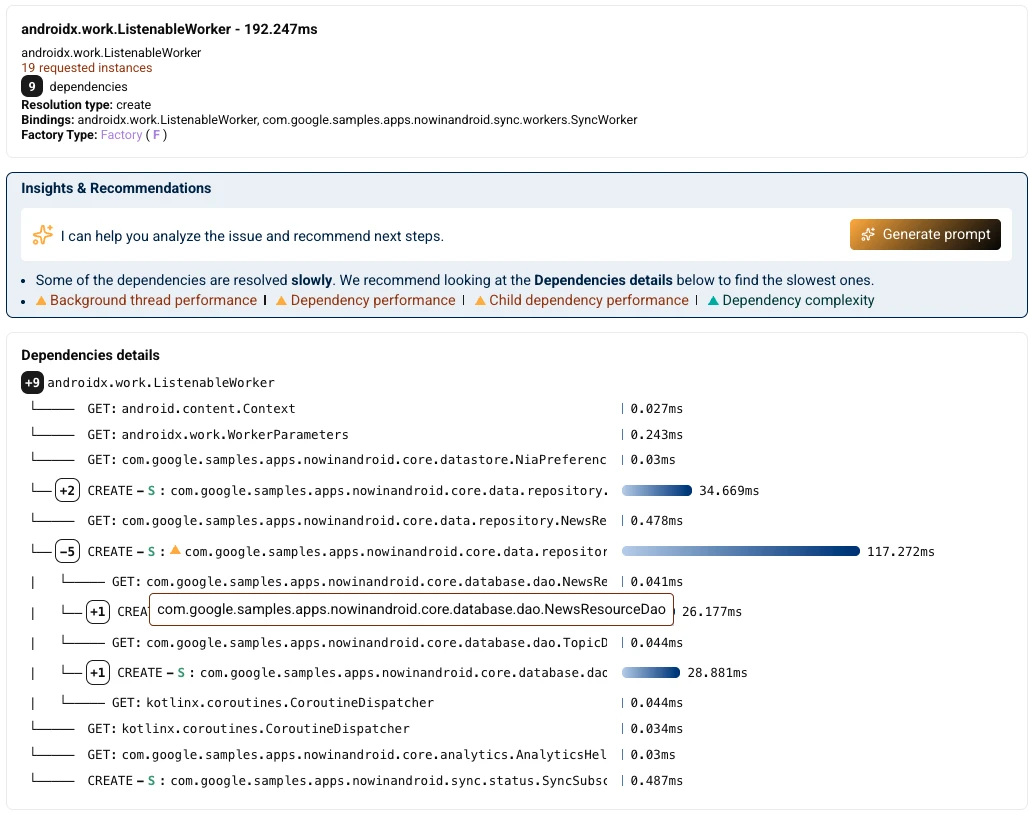
The Timeline view also includes a dedicated tree graph view for each component resolution event. This graphical view makes it easy to explore dependency hierarchies, understand which resolutions are taking longer, and identify potential performance bottlenecks. Clicking on a component flagged with an issue will show:
- Resolution time for each component and its dependencies
- Overall graph complexity and depth of nesting
- Flagged performance issues detected during resolution
- Smart recommendations to help uncover root causes and suggest fixes
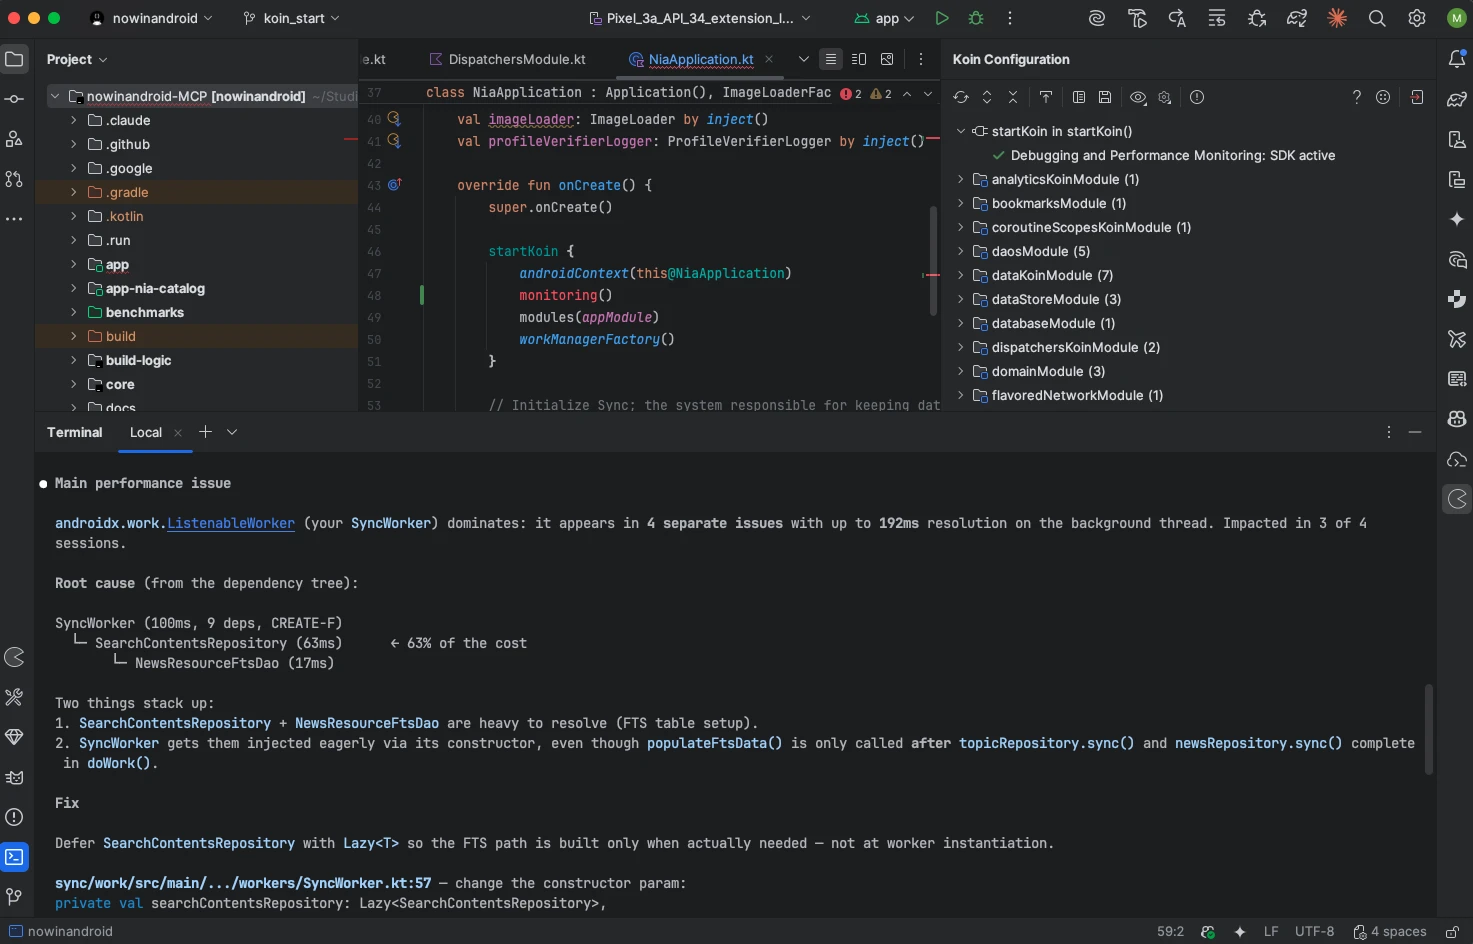
4. Investigate and fix issues from your AI coding assistant
The same issues can be investigated and fixed directly from your AI coding assistant using natural language. If you have the Kotzilla MCP Server installed, open Claude Code, Cursor, Windsurf, or any MCP-compatible assistant and ask:
What is the main performance issue of my app and how to solve it?
The assistant queries the Kotzilla Platform for the same session data shown in the Console, returns the top issue with its root cause (blocking calls, slow dependency resolutions, heavy ViewModel init, and others), and can apply a concrete fix to your code under your review. This complements the Console investigation: same data, same root cause analysis, surfaced inside the tool you are already working in.