Start with the Plugin
Follow the steps below to install the Koin IDE Plugin and start debugging and monitoring your Kotlin apps directly from Android Studio or IntelliJ IDEA.
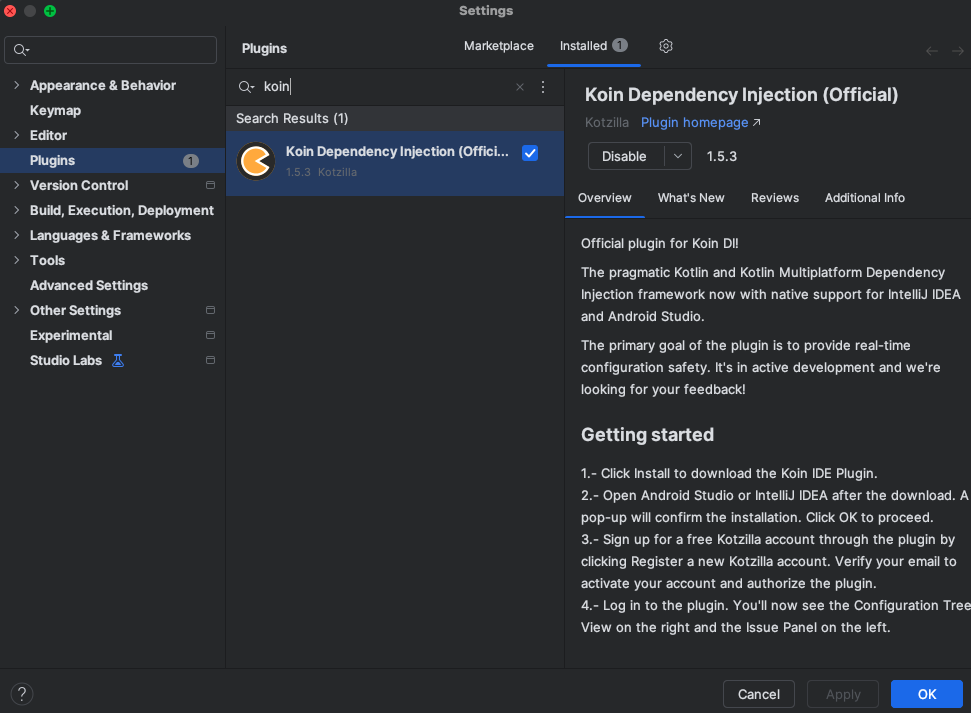
Step 1: Download the plugin
Visit the JetBrains Marketplace and click on Install to get the Koin IDE Plugin. The plugin will automatically download and prepare for installation

Step 2: Validate the installation
Open Android Studio or IntelliJ IDEA after the plugin download is complete. A pop-up window will appear with a description of the Koin IDE Plugin. Click OK to complete and validate the installation.
Step 3: Create an account
To start using the plugin, you’ll need to create a Kotzilla account. Sign up directly through the plugin by clicking on the Register a new Kotzilla account button. This will redirect you to a web signup form.
By creating an account, you'll gain access to both the Koin IDE Plugin and the Kotzilla Platform. You'll also unlock exclusive resources, community insights, and support.
After the sign-up please check your email and verify your account to activate it
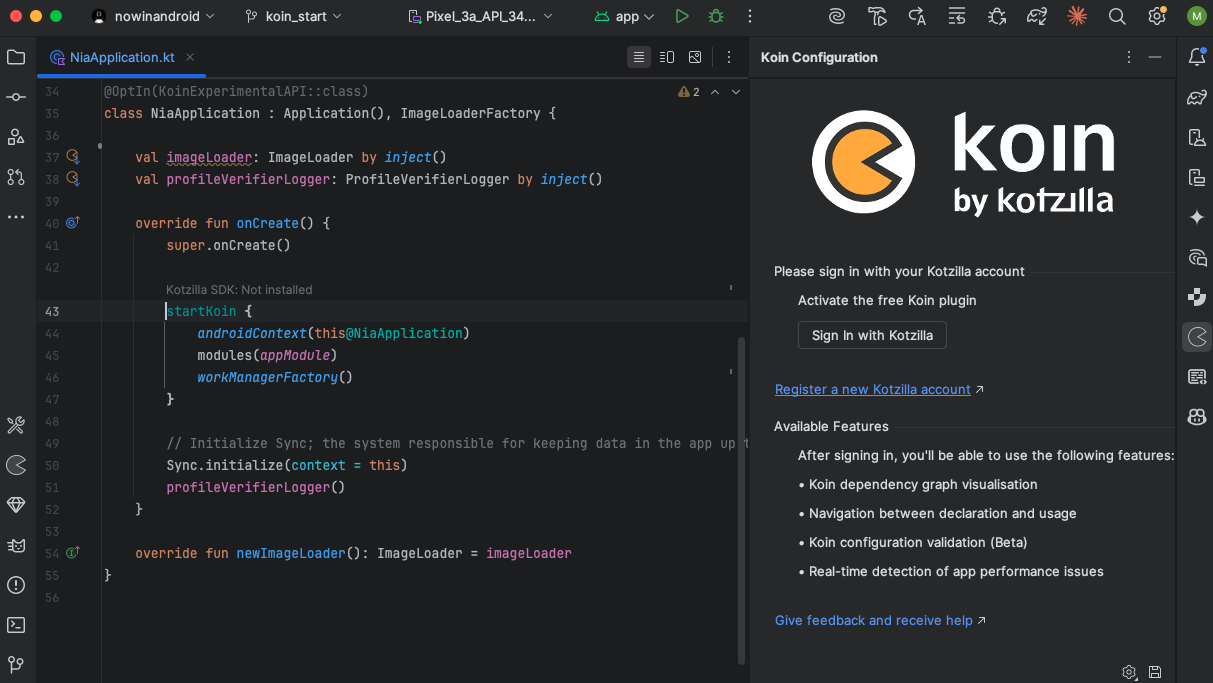
Step 4: Sign in
Once your account is verified, sign in to the plugin by clicling on the Sign In with Kotzilla You’ll now see the Configuration Tree View on the right side of the screen
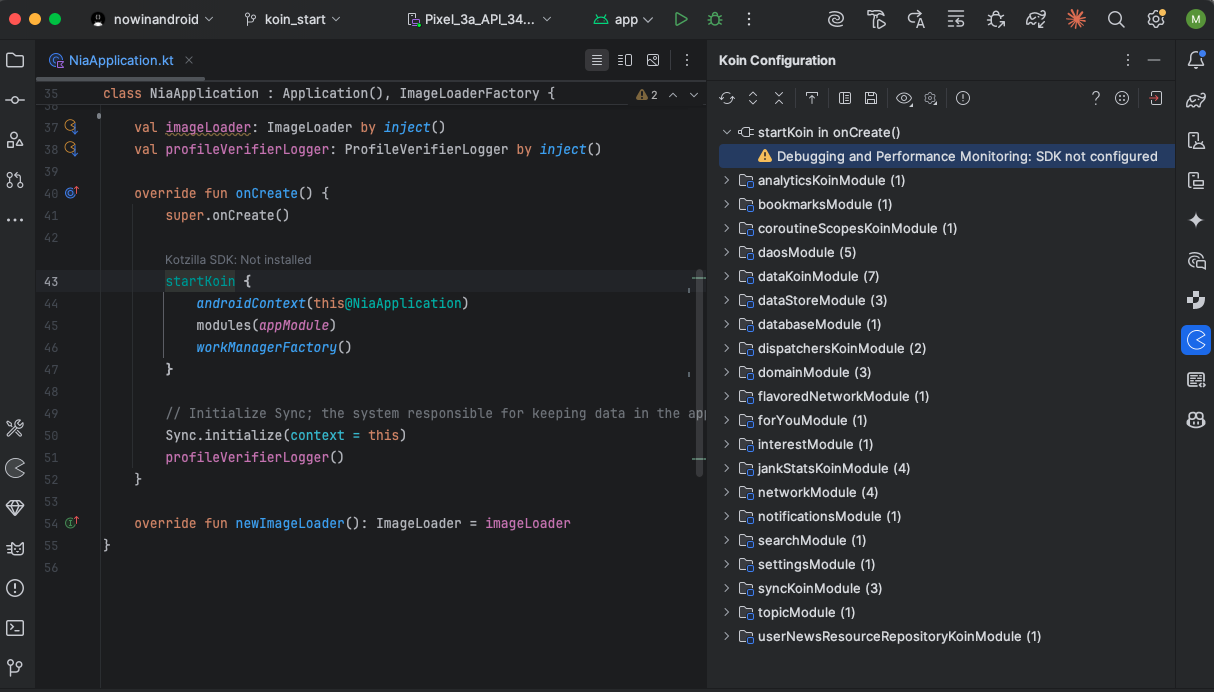
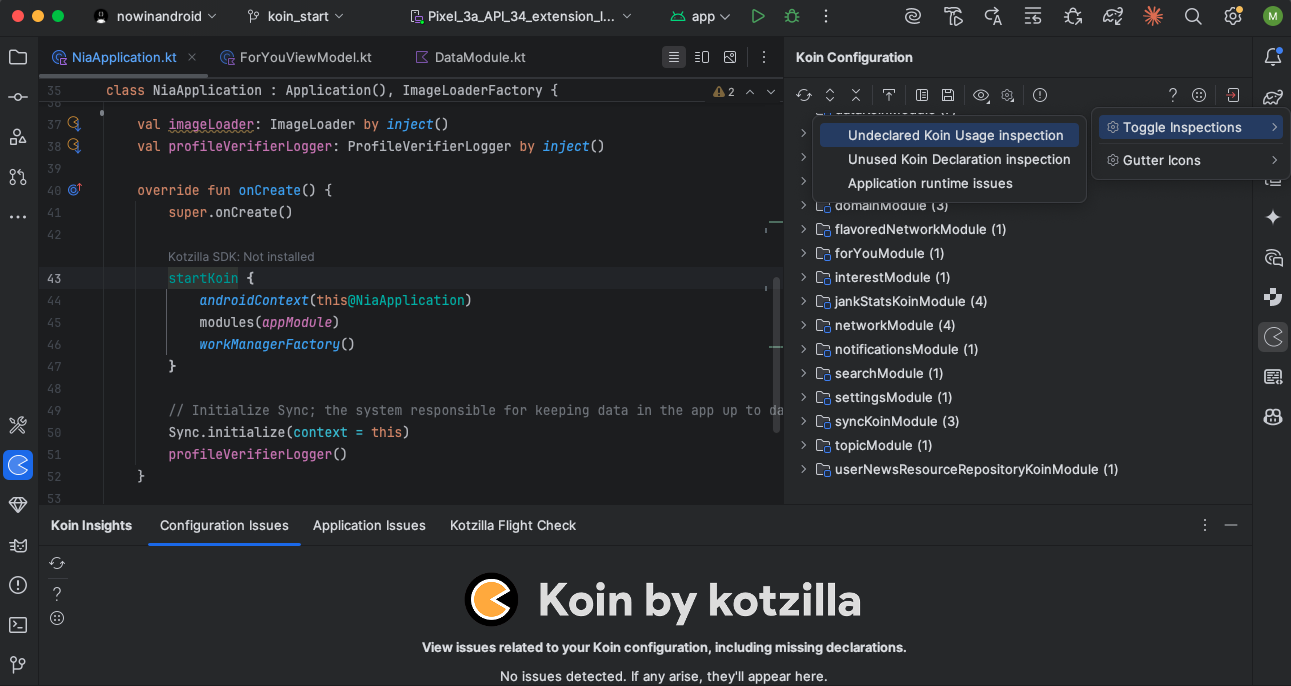
You should also notice the Koin Insights view on the left side, giving you full access to both Koin configuration and app issues detected. See below an example of app with configuration issues detected:
If desired, configuration issue inspections can be disabled. Go to the Koin Settings-> Toggle Inspections menu
Step 5: Debug and monitor your app
To start debugging your app and resolving issues like performance bottlenecks, thread blockages, or complex dependency graphs, ensure the Kotzilla SDK is correctly set up. The plugin checks SDK configuration in real time and shows a status indicator in the Koin configuration view.
If the SDK isn’t configured yet, click the indicator to open the Kotzilla Flight Check tab. This tab provides a complete overview of your current setup, including your Koin version, the latest SDK version, and your app’s package ID.
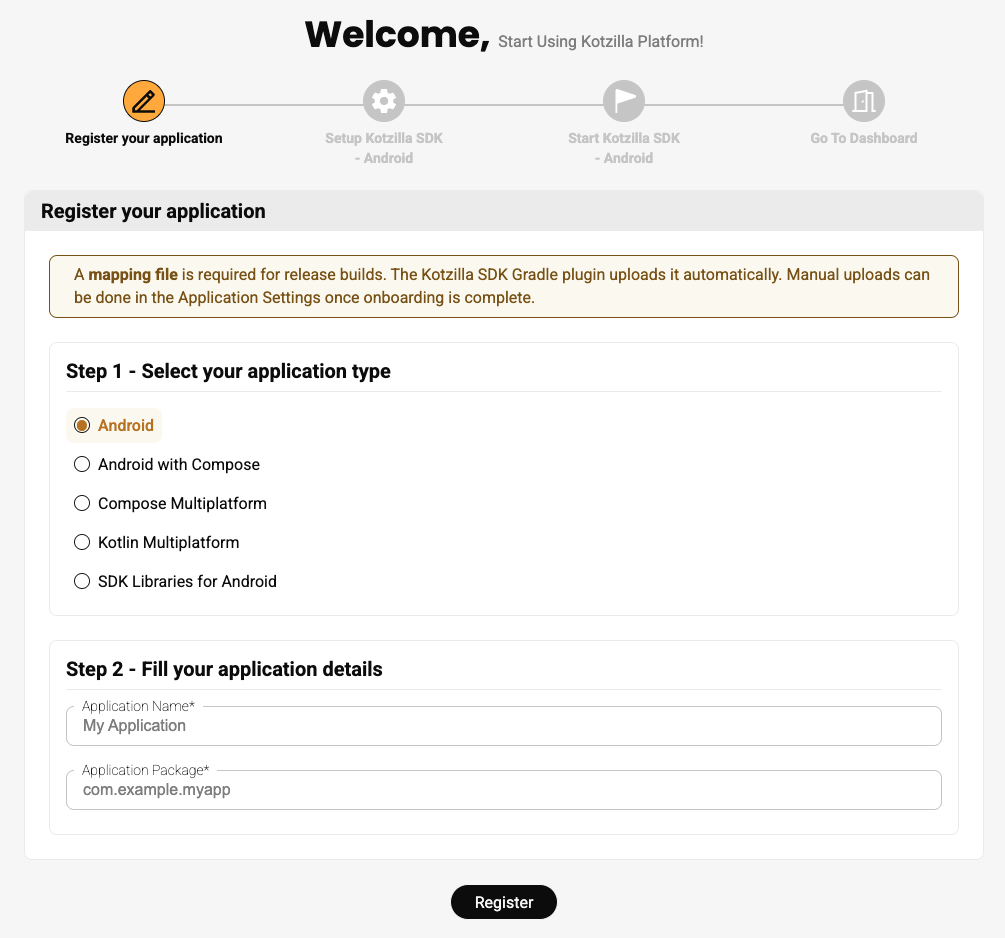
A Manual Setup button will appear for any application. Clicking it redirects you to the Kotzilla Console onboarding page, where you can register your application, select the app type, and enter the required details.
Depending on the app type selected, follow the dedicated setup steps:
- Android
- Android with Compose
- Kotlin Multiplatform (KMP)
- Compose Multiplatform (CMP)
- SDK Library for Android
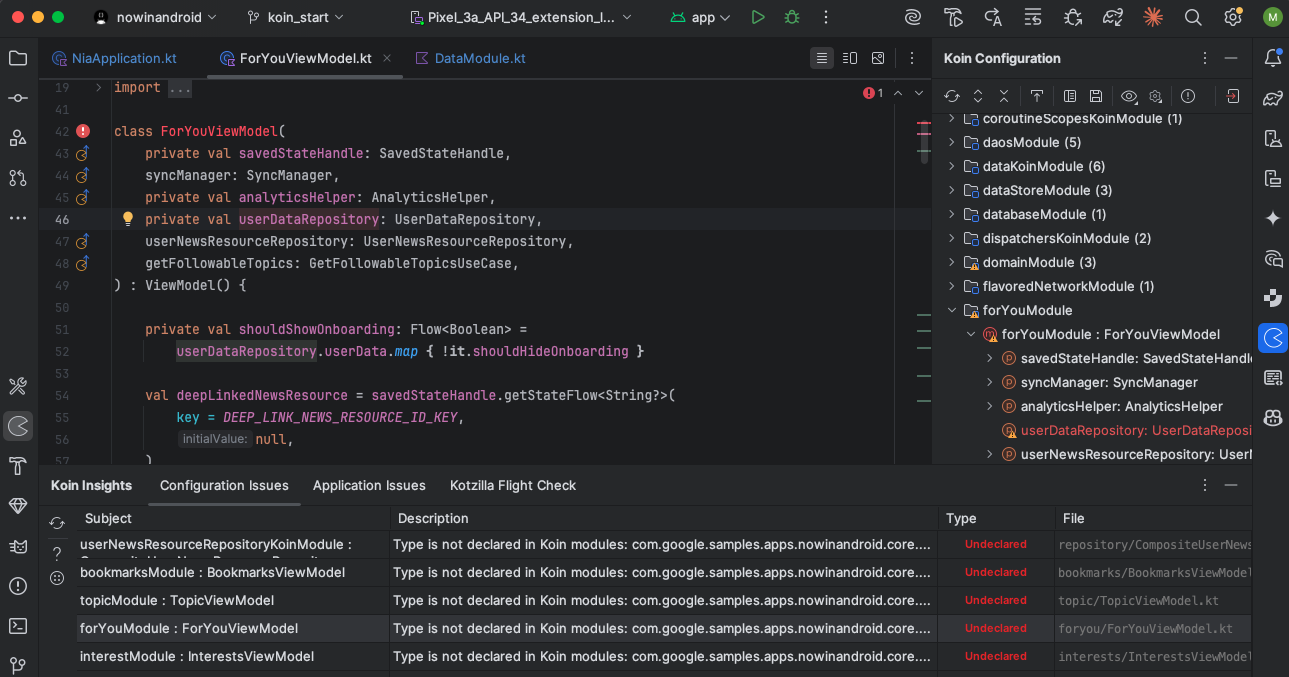
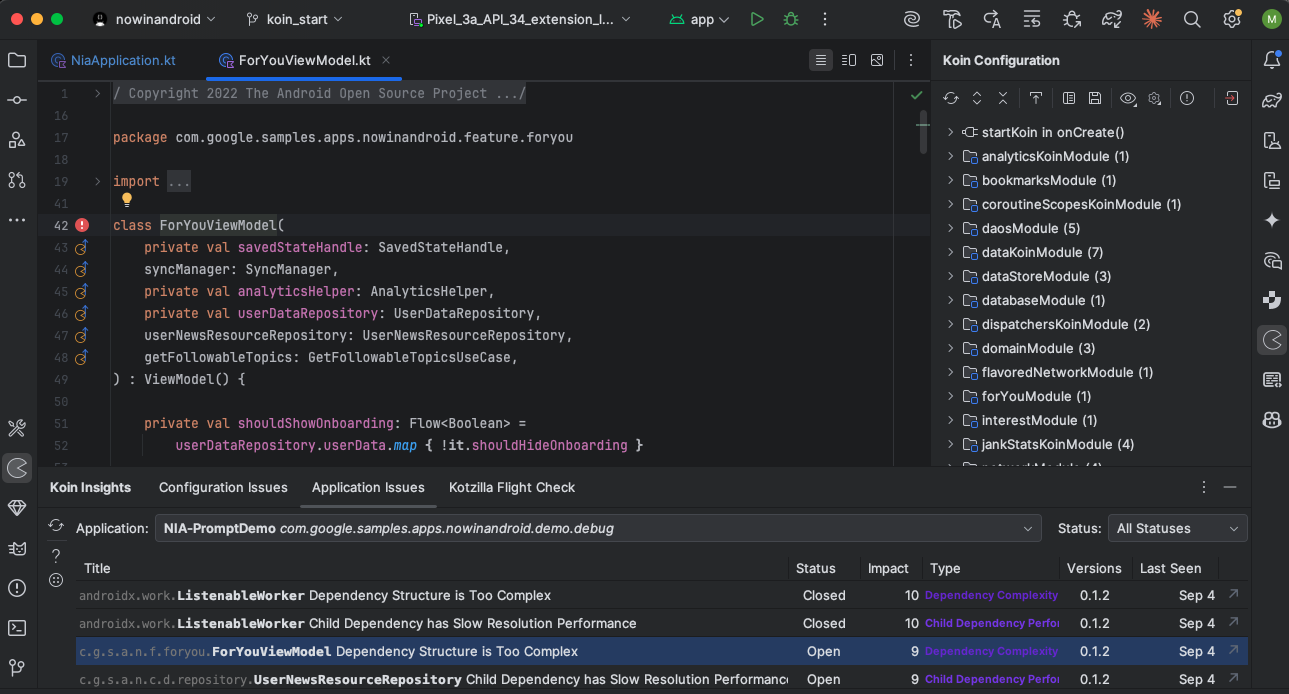
Once the setup is complete, sync and run your app to capture your first user session. The Application Issues panel will automatically show any app-related issues detected in real time.
Technical requirements
- IDE: IntelliJ IDEA 2024.2 or later (Windows, macOS, Linux) or Android Studio Ladybug or newer
- Kotlin: 1.7.0 or higher
- Gradle: 7.0+ for Android applications
- JVM: 11+ for server-side Kotlin development
Questions or issues during setup? Contact us. We are here to help!
Have you tried the Kotzilla MCP Server? It can guide your setup and analyze issues directly from your AI coding assistant.
- Android: API level 21 or higher